Monday, January 30, 2012

Battle Report: Blood Angels vs Orks 750 points

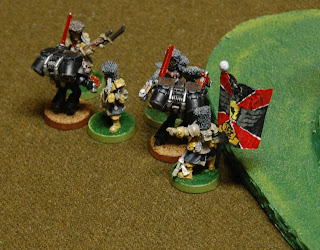
I found someone in my local area who plays Warhammer 40k. In actuality, I found a lot of people. He is a teacher at a local school, and he has an after school program for gamers. There are middle school age kids playing Magic and Yu-Gi-Oh, etc. The Holy Grail is that there are a dozen or more young 40k players. They are at various stages in building and painting their armies. So, they currently run 750 point games.

I went in for the first time today and met my new 40k friends for the first time. I am happy to have the occasion to help some young guys learn the game and learn painting and modeling. The teacher, the Dark Saint (dakkadakka handle), is my newest 40k friend. I think he is happy to have another adult to help with the young 40k folks.

On to the battle. We played a friendly 750 point battle. Dark Saint's Orks vs my Angels Sanguine.

I ran the following list:
Librarian-Jump Pack, Meltabombs, Shield of Sanguinius and Unleash Rage
2 Sanguinary Priests-Jump Packs
Assault Squad-10 Marines, 2 Meltaguns, Powerfist

My opponent ran the following (from memory):
Warboss-AoBR wargear and 3 Meganobz in a trukk
3 Killa Kanz
2 units of 20 Boyz plus Powerklaw Nob and Rokkit Launcher (or two) in each

Dark Saint's Deployment
Mission: Annihilation
Deployment: Spearhead

I won the roll-off and chose to go second. Dark Saint selected a table quarter and plopped down everything. I reserved everything for Deep Strike. Nothing was effected by Red Thirst. I attached a Priest to each Assault Squad, and I attached the Librarian to one Squad.

He moved toward the center of the table for the first two turns. Both of my Squads arrived on turn 2. One of them via a descent of angels re-roll. He had positioned his trukk and kanz in the center of his force, flanked on either side by a unit of boyz. So, I dropped everything in on his left flank in such a position that terrain and the size of his boyz unit would eliminate anything else from engaging me (that was the plan at least). I ran to spread out my squads as he had the grotzooka with a blast template on one of his Kanz.

As the top of turn 3 rolled around, I realized that I failed to account for the Waaaggghhh. The trukk drove around the intervening terrain and out popped the Warboss and Meganobz. However, they rolled a 1 on their Waaagghh fleet. As a result, the slow and purposeful roll kept them from charging (plan successful so far). His boyz took advantage of the fleet roll and charged my librarian assault squad (plan was for me to get the charge). This assualt lasted two assault phases (his and mine) with the result of one dead Marine and the Orks cut down in sweeping advance.

Bottom of Turn 3
In the bottom of turn 3, I assaulted the warboss and meganobz with the non-librarian assault squad. This Assault lasted two phases. I cut down all the orks, and had about 6 Marines left: Priest, Sgt, and 4 Marines.

Well, the Assaults turned out well. So far, I had 2 or 3 Kill Points to Dark Saints 0 KP. His army was trying to come over to help out. Kanz followed by the other unit of boyz. So, I was free of hand to hand in Turn 4. I jumped over the terrain to use the trukk and terrain to keep the Kanz out of Assault Range. My plan was to meltagun the trukk and assault the boyz. I wrecked the trukk with the meltaguns in one squad (it was too far to assault the boyz), and my lead squad assaulted the boyz.

When the top of turn 5 rolled around, I had made a mistake. The Kanz assaulted my librarian assault squad. This kept them from being able to reinforce the weaker squad (which had a tough battle with the meganobz and warboss). This turned out to be the turning point of the battle. Dark Saints Kanz killed a lot of marines and the squad broke. My marines regrouped and jumped over to support the other assault squad should the game last.

The game went to turn 6. I had made the same mistake again. One Kan was able to get into assault. It was close. Dark Saint and I both looked at the measurement. He was in range. His boyz managed to kill off my non-librarian squad, and the Kanz killed off my librarian assault squad (all that was left: librarian, priest, sgt).

I had gathered 4 of his 6 available Kill Points, but it did not mattered. Dark Saint had tabled me in turn 6. It was a good game with a good opponent. It is nice to meet someone who is a good sport and fun player. Also, he is giving back to the community by hosting an after school club.

Lessons learned:

-Descent of Angels style army worked very well here. I was able to attack on the flanks and keep my opponent from engaging with his entire force.

-Priests are very awesome. The Feel No Pain rolls made a huge difference in this game. I cannot stress enough how valuable these characters are for supporting assaults.

-The librarian was awesome. Unleash Rage proved to be quite useful. There was not a lot of shooting going on. So, having Shield of Sanguinius had no effect on the game.


-Tactical Error: I should have jumped into position to fire on the Kanz. I still had 4 Meltaguns at the time. The other group of boyz would not have been able to get over in time to help them. Instead I tried to avoid the Kanz. My plan was to ignore them and just jump right by. Even if I had stayed farther away, the Kanz would have come over to counter-assualt after I engaged the boyz. Meltagunning the kanz would probably have been the better play.

Saturday, January 28, 2012

Assault Squads: Remodeling complete

Assault Squad 1 Before
I have finished remodeling my Assault Squads. All three squads have been increased from the mech riding 5 marine squads to the deepstriking 10 marine squads. Also, all the original members have received the new urban bases.

Assault Squad 1 After
I give you the before pictures taken in 2009 and the after pictures taken earlier today, 2012.

Assault Squad 2 Before


Assault Squad 2 After
Assault Squad 3 Before

Assault Squad 3 After


Monday, January 23, 2012

Assault Squad WIP: New Recruits

I have the newest recruits for the makeover of my second Assault Squad. Two of these models are from the Assault Squad box of five, and one of them was purchased as plasma gunner. They have turned out well. I am about half way finished with their jump packs.

While I was working on them, I got out the original 5 members of this Assault Squad and started the process of re-basing them. I expect to be finished with this squad tomorrow. That will give me 2 full strength (10 Marine) Assualt Squads packing 2 meltaguns and powerfists. I will then turn my attention to the third squad.


As I have found someone in the local area who plays 40k, I have a game scheduled for Friday. Nothing motivates me to finish a project better than the prospect of playing with the models on the table top!

The Original 5 Members

Saturday, January 21, 2012

Terrain WIP: Imperial Cathedral and Barricades


These pictures show the progress of my Imperial Cathedral. Also, I have thrown together some barricades to scatter about the board. I believe the pictures tell the story. I am closing in on throwing some paint on this stuff.

As always, your comments are welcome. Also, I would be glad to answer questions about my methods.


Monday, January 16, 2012

Modular Terrain WIP: Day Four

 More progress made today. I have added some green paint over the brown.

I applied some black paint thinned down into a wash over all the rocks (areas sprayed gray) to bring out the details.

After that, I began with a gray drybrush (working up through a couple of shades mixing white) over the rocks and on the raised terrace/foundation of the city.

I think that I am ready to start with flock and static grass.


Sunday, January 15, 2012

Modular Terrain WIP: Day Three


 I added some color to the board. I sprayed some gray in the low places and on the rocks. After that, I sprayed on a good earthy color: brown.

While I was waiting on that to dry, I started work on my Imperial Cathedral. I have also included a couple of pictures of the first generic ruins.
Imperial Cathedral

I hope you enjoy. As always, thanks for reading, and comments are welcome.
Imperial Cathedral


Saturday, January 14, 2012

Modular Terrain WIP: Day Two

An update on my progress and method. Yes, there is a method to my madness.

Well, everything had plenty of time to dry during the week. So, with all the glue dried, I was ready to put on a base coat of paint. I was off to Leroy Merlin in order to buy a gallon of paint.

As an American living in Italy, I had a pretty fun time trying to buy the right paint. The gentleman working in the paint department didn't speak English, and I don't really speak Italian (enough for greetings and ordering food or an espresso at the Caffe Bar). So, he logged onto his computer and navigated to Google Translate. I typed in what I wanted, and he typed in the response. All in all, it was a pretty cool experience.

I learned a few things. One important one is that we Americans are fond of talking about latex paint. The Italian paint industry does not follow this pattern. My understanding from further research is that there is not any actual latex in latex paint. It is a term which we use to describe several different polymer compositions which act like latex after they dry.

Asking for textured latex paint did me no good. After telling him what I was doing, we found a non-textured acrylic paint which is water soluble for cleaning and dries to form a flexible and resilient coat of paint.

I painted this on with a brush. It took three coats to cover the yellow polystyrene. After this had dried, I began putting modeling sand (I used a tub from GW) into the craters. I painted on PVA glue and poured the sand in on top. I also glued on some small rocks which I grabbed out of the parking lot at my apartment. I brought the rocks/pebbles in and rinsed them off. After drying, I placed them into some of the low places with PVA glue.

I want to mention that I traced out a pattern for cement/asphalt on the raised terrace. I cut a small 'v' into the surface to imitate the joints in cement or concrete. I also cut some small squares of thin, one-layer cardboard (from a cereal box) and glued them on the side of the raised terrace area. This will add a bit of detail to look like joints in concrete or the like.

We are well on our way. I ordered a bunch of flock and static grass, but the next step is more painting.

Monday, January 9, 2012

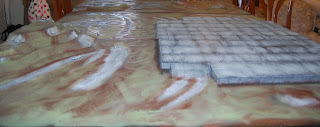
Modular Terrain WIP: Day One

 I started the Modular Terrain Gaming Board officially today. Technically, I did quite a bit of internet research via google last night. I found the following links which I found helpful: Cool Mini or Not and Digger's Rest. Also, Karitas shared his work with me, and I found it to be tremendously helpful as well.


Following Karitas's advice, I started with some sketches in my notebook. I decided to build a city on a raised terrace on two separate pieces of my 2'x4' polystyrene (I bought this at Leroy Merlin over the weekend aproximately 15 Euro for 6 sheets sized 2'x4'). The two pieces could be together for one large city or on opposite edges of the table for two separate city sections. I wanted to put a hill on the opposite side of the same boards as the city. On the remaining  2'x4' board, I decided to place hills with trench works. The pictures will reveal that I abandoned this idea during the manufacturing process. I decided that trench works should be a separate board, and that rolling hills and craters would serve for this board.

Three of the 2'x4' polystyrene sheets would form the 'ground' for the battlefield. I used a sharpee pen and a standard tape mearsure to sketch out my pieces on the remaining three sheets of the polystyrene. I would use those pieces to build up from the 'ground.'

I cut out the raised terrace or foundation for the city portion and the three layered hill as see in the photo. Of course, I double and triple checked to make sure that they they were flush (lined up evenly) before I glued them.

I used a hot wire cutter whenever it could reach and an x-acto knife where the cutter couldn't reach. I have an old wooden chopping block which I use under all cuts with the x-acto knife to keep from cutting anything in my house, for example: my wife's Italian dining room set or a rug thrown over our tile floor.


 Furthermore, hot wire cutters get hot. So, BE CAREFUL. Also, modeling knives are very sharp and cut deep. So, BE CAREFUL and cut away from yourself.

I left the raised terrace/city foundation squared off. It will become man-made concrete base for the city. However, I sloped the hills. I want them to look as natural as possible while still providing excellent places for minis to stand or drive.

 After cutting and sloping and sanding the hills until I was content, I glued them to the 'ground.' On occasions like this one, I am happy to be a Chaplain in the U.S. Navy. My degrees in Theology mean that I have a fairly significant personal library with lots of big, heavy reference material to weight down the poly while the glue dries.

It was at this point in the process (beginning work on the third 'ground' sheet) that I cancelled the idea of the trench works for this board. After seeing the sheets laid out in real size, it seemed as though I was forcing a combination between two great but separate ideas for gaming boards.

I opted for rolling hills with craters. I cut out some pieces to build up my hills and began shaping them. They are sloped off with the wire cutter, melted with a butane cigar lighter, and sanded with fine grit sandpaper.

I used the cigar lighter to melt wholes into the raised portions, and on occasion slightly into the 'ground.' These wholes will become craters and blast marks later.

I glued the rolling hills on and left it all to dry. I used Wood Glue for all the gluing up to this point.


Sunday, January 8, 2012

New Project: Modular Terrain

I bought six 2'x4' sheets of polystyrene the other day at Leroy Merlin. I am planning on building some Modular Terrain pieces for a gaming board. This project is very exciting to me. It is something that I have wanted to do for a long time. However, I could never really afford to put the money or time into it.

All the stars have come into alignment. So, I am researching and planning out my modular terrain.

As my Angels Sanguine army have urban bases, I am planning to make some type of urban battlefield or ruined city. This will be my 'home field.' Anyone who comes to my house to play should feel like the visiting team on the pitch!!

If you all have any suggestions or great links to turorials, etc. Let me know, please.

Friday, January 6, 2012

A Game Tomorrow

I have done it. I have a game scheduled tomorrow. However, it is an introductory game. I will be introducing two friends to Warhammer 40k. I have talked about it a bit at work, and they are interested.

So, I am working up a 1000 point list from my Angels Sanguine and from my old Imperial Guard. I am trying to keep things simple in hopes that I can focus on teaching them the basic rules. I don't want things to get crazy with special circumstances. It should be a lot of fun.

Monday, January 2, 2012

Assault Squad Progress

As many of you know, I am in the process of upgrading my Angels Sanguine Army (Blood Angels, of course) from the Mechanized Rhino list that I ran under the previous codex to a Descent of Angels list under the current codex. As one Assault squad is nearing the completion of the upgrade, I give you the before and after pictures. Well, not quite after, but we are getting really close.

This particular Assault Squad needed the most work to get up to speed for the list I want to run. This squad was made up of spare parts and a couple of AoBR simple conversions. I have a link here to my blog post from a couple years back when I first created them.

As they were made of spare parts, I had no Jump Packs for them in the beginning. Also, I settled on the Rhino Mech List and didn't need the Jump Packs. So, I had not magnetized them.

Naturally, I had to fix all that now. So, I popped of the backpacks. I did this very carefully, because I didn't want to destroy the models or their paint jobs in the process. As I am not the type to drown the model in glue when assembling, this was pretty easy. Much easier than I thought. I used a small metal fingernail file wrapped in a napkin for the one stubborn backpack in the bunch.

Following that process, I went through my standard drilling and magnetizing described in this previous blog post.

I pulled out the AoBR conversion Sgt, and I dropped a Powerfist Assault Marine Sgt in his place.  Also, I added three more Assault Marines who are painted up and waiting for their clear coat.

This brings the squad up to full strength at 10 Marines. All are magnetized for either backpacks or jump packs. I have three of the 'veterans' left to re-base, and jump packs to paint. Beyond those tasks, the squad is ready to strap on their jump packs and descend on the enemy with the Emperor's wrath.

On a bit of a side note, the AoBR Captain Sgt has been promoted. He will undergo a few alterations to become my Librarian.